
Woodworking clamps are indispensable in the world of woodworking, carpentry, and furniture making. These versatile tools hold materials together securely, ensuring precision and accuracy in your projects.
Over time, woodworking clamps can accumulate dirt, especially in the form of glue residue. This not only affects their performance but also compromises the quality of your work. In this guide, we’ll explore how to clean your clamps and keep them in showroom-worthy condition.
Cleaning with White Vinegar

Lucy's Family Owned - Organic Apple Cider Vinegar & Natural White Vinegar Bundle (128oz Bottles - 2 Total)
$39.99 in stock
Aftercare and Maintenance
While prolonged use may prevent your clamps from looking as good as new, you can maintain them in excellent condition for future projects.
Applying paste wax is a practical solution to protect clamps from glue buildup, which often leads to the lower jaw sticking due to dried glue. This additional step ensures that your clamps remain in good working order and ready for your next project.
Why Clean Clamps Matter
Clean clamps are essential for ensuring optimum functionality. Dirty clamps not only hinder their effectiveness but can also transfer debris onto your work surface, resulting in a subpar final product.
To keep your clamps in top condition, remember to lubricate moving parts to prevent rusting and uncomfortable unhinging noises.
When storing your clamps, choose a dry place away from heat to preserve their performance and longevity.
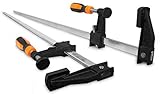
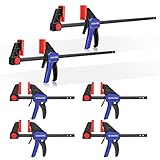
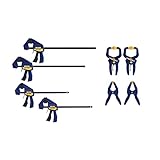
Need New Woodworking Clamps?
If your old clamps are unusable it might be time to upgrade and buy new ones. Here’s a list of clamps you might like:


Conclusion
Manufacturers may claim that their clamps are glue-resistant, but real-world experience often proves otherwise. To avoid the hassles of stuck glue and compromised clamping performance, regularly apply paste wax to new clamps.
If glue residue does accumulate, use a putty knife for removal and a steel brush for stubborn debris. These tips can be especially helpful when you’re short on time during a project.
Alternatively, you can protect your clamps by using wax paper or plastic sheeting to shield them from adhesive. Promptly wiping off any glue that comes into contact with the exposed clamp ensures that they maintains their pristine condition, ready for your next woodworking masterpiece.