Welcome to the world of woodworking finishes! In this step-by-step guide, we will walk you through the process of applying a finish to your woodworking project. The purpose of this guide is to help you achieve a beautiful, professional-looking result for your woodwork. Whether you’re a beginner or an experienced woodworker, we’ve got you covered with clear and concise instructions. So let’s get started and make your woodworking project shine with the perfect finish!
Top Picks for Perfect Wood Finishes


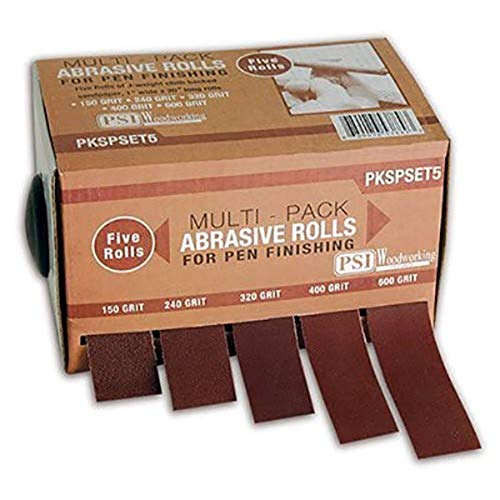
Gather Materials
Gather all the necessary materials for applying a woodworking finish. Start by grabbing sandpaper to prepare the wood surface, followed by brushes for applying the finish. Don’t forget to grab some rags for wiping away excess and wood stain to give the wood a beautiful color. Lastly, make sure to wear protective gloves to keep your hands safe throughout the process. Happy woodworking!

![Comfy Package [100 Sets] 16 oz. Clear Plastic Cups With Flat Lids](https://m.media-amazon.com/images/I/31+AGym+6VL._SS520_.jpg)

Prepare the Surface
To prepare the wood surface, start by thoroughly cleaning it to remove any dust, dirt, or previous finishes. Use a damp cloth or vacuum with a brush attachment to ensure a clean surface. Next, use sandpaper to smooth out any imperfections or rough areas. Begin with a coarse-grit sandpaper and gradually move to a finer grit for a smooth finish.
Apply Wood Stain (Optional)
If you want to change the color of your wood, you can apply wood stain. First, decide on the desired color and choose a wood stain that matches. Next, carefully follow the instructions on the stain product, as different stains may have different application procedures. Remember to apply the stain evenly and allow it to dry completely before moving on to the next step.
Stir the Finish
To thoroughly stir the woodworking finish, grab a stirring stick or a stirrer attachment for a handheld power drill. Insert the stirring stick or attachment into the finish container and start stirring in a circular motion. Mix the finish for about 2-3 minutes, ensuring that all the sediment at the bottom is fully incorporated. This will provide you with an even consistency and ultimately a smooth application on your woodworking project.
Apply the Finish
To apply the finish, start by using a brush or rag to apply a thin, even coat onto the wood surface. Make sure to follow the grain of the wood to achieve a smooth application.
Allow Drying Time
To ensure a successful finish, it is crucial to allow the drying time recommended by the manufacturer. This will vary based on the type of finish you are using. Some finishes may only take a few hours to dry, while others may require several days. Before proceeding with any further steps, make sure to carefully follow the manufacturer’s instructions and allow enough time for the finish to dry completely.
Sand between Coats (Optional)
To achieve a smoother finish on your project, it is recommended to lightly sand the surface between coats of finish. Start by using a fine-grit sandpaper and gently go over the entire surface, making sure to remove any imperfections or rough spots. After sanding, use a clean, dry cloth or a tack cloth to remove any dust or debris. This will ensure a clean surface for the next coat of finish and result in a professional-looking final product.
Apply Additional Coats
To apply additional coats of the woodworking finish for a more durable and polished result, follow these steps:
- After allowing the previous coat to dry completely, lightly sand the surface with fine-grit sandpaper to create a smooth finish.
- Clean the surface with a tack cloth or microfiber cloth to remove any dust or debris.
- Apply a thin, even layer of the woodworking finish using a brush or applicator pad. Work in small sections, starting from one end and moving towards the other.
- Allow the coat to dry according to the manufacturer’s instructions before applying the next coat.
- Repeat steps 1 to 4 for each additional coat, ensuring the surface is clean and dry before proceeding.
For example, if you are applying a clear polyurethane finish to a wooden table, follow these steps after each coat has dried: lightly sand the surface with 220-grit sandpaper, wipe away the dust, apply a thin coat of polyurethane, let it dry for at least 4 hours, and repeat until you achieve the desired level of protection and shine. Remember, patience is key to achieving a flawless finish.
Final Sanding
To achieve a smooth and even finish after the final coat has dried, lightly sand the surface. Use a fine-grit sandpaper and apply gentle pressure in circular motions. Be sure to sand all areas evenly, paying close attention to any rough spots or imperfections. After sanding, wipe away any dust with a clean cloth or tack cloth before moving on to the next step in your project.
Apply Protective Topcoat (Optional)
To enhance the durability and longevity of your woodworking finish, you can choose to apply a protective topcoat. Here’s how you can do it:
- Start by ensuring that your woodworking finish is completely dry.
- Use a high-quality brush or roller to apply the protective topcoat evenly and smoothly over the entire surface.
- Allow the topcoat to dry according to the manufacturer’s instructions. This usually takes a few hours, but it can vary depending on the product.
- If necessary, you can lightly sand the surface between coats to achieve a smoother finish.
- Applying multiple thin coats is recommended for better protection and a more professional look.
- After the final coat, let the protective topcoat cure for the recommended time before using or handling your woodworking project.
For example, if you have built a wooden dining table that will be subjected to regular use, applying a protective topcoat will help guard against stains, scratches, and other forms of wear and tear. A popular choice for a topcoat is a polyurethane varnish, which provides excellent protection and a glossy finish. Remember to follow the instructions provided by the manufacturer of your chosen topcoat product for the best results.
Wrap it up and finish strong!
In conclusion, applying a woodworking finish is an essential step in achieving a professional look for your project. Throughout this guide, we have emphasized three key points: proper surface preparation, even application, and allowing sufficient drying time. By taking the time to prepare your surface correctly, ensuring an even application, and allowing the finish to dry adequately, you can achieve a beautiful and professional-looking result. So, gather your tools, follow the steps we’ve outlined, and enjoy the satisfying feeling of completing your woodworking project with a flawless finish. Happy woodworking!
Essential Supplies


Mastering the Gloss
Getting the perfect finish for your woodworking projects
- Choose the right finish: There are various types of woodworking finishes available such as polyurethane, varnish, shellac, and oil-based finishes. Research and understand the characteristics of each finish to select the one that suits your project’s requirements and your skill level
- Prepare the surface: Before applying any finish, ensure the wood surface is clean, smooth, and free of dust. Sand the surface using different grits of sandpaper, starting from a coarser grit and gradually moving to finer ones. This creates a smooth surface for better finish application
- Apply the finish: Follow the manufacturer’s instructions on how to apply the chosen finish. Use a clean brush or a soft cloth to apply the finish evenly in the direction of the wood grain. Avoid leaving brush marks or visible strokes. In case of drips or runs, smooth them out immediately
- Allow adequate drying time: After applying the finish, let it dry for the recommended duration mentioned on the product label. Be patient and avoid touching or moving the piece while it dries, as this can disrupt the finish and create imperfections
- Sand between coats: If you plan to apply multiple coats, sand the surface lightly using fine-grit sandpaper between each coat. This helps remove any imperfections and promotes better adhesion between the layers. Remember to clean the surface from dust before applying subsequent coats
- Remember, practice makes perfect! Don’t be afraid to experiment with different finishes on scrap wood to see what works best for you
All Your Questions Answered: Woodworking Finishes FAQ
Can you explain the difference between oil-based and water-based finishes?
Of course! Oil-based and water-based finishes are two different types of coating products that provide protection and enhance the appearance of wood surfaces. Here’s the difference between them:
Oil-based finishes: These products are made primarily with oil, such as linseed oil or tung oil, mixed with solvents and resins. They have been used for centuries and are known for their durability and rich, warm tones. Oil-based finishes penetrate deeply into the wood fibers and create a protective layer on the surface. They bring out the natural beauty of the wood, such as enhancing grain patterns. They tend to provide a glossy or satin sheen.
Water-based finishes: Unlike oil-based finishes, water-based finishes are made primarily with water and resin polymers. They have gained popularity in recent years due to their low VOC (volatile organic compounds) content and faster drying times. Water-based finishes have a lighter appearance compared to oil-based finishes and tend to preserve the wood’s natural color better. They also provide excellent protection against moisture, making them suitable for areas prone to spills or high humidity. Water-based finishes have a clear or slightly milky appearance and can produce a variety of sheens, from matte to glossy.
In summary, oil-based finishes offer rich colors, deep penetration, and a traditional look, while water-based finishes provide a clear, natural appearance, faster drying times, and low VOC content. The choice between them depends on your personal preferences, the type of wood you are finishing, and the intended use of the surface.


