Looking to add a touch of warmth and character to your home with a homemade wooden bookshelf? This step-by-step guide is here to help you create the perfect piece for showcasing your favorite books and decorative items. With clear instructions and handy tips, you’ll be able to confidently tackle this woodworking project and create a beautiful bookshelf that reflects your personal style. Let’s get started!
Popular Projects for DIY Woodworkers


Gathering Materials and Tools
To create a homemade wooden bookshelf, you’ll need a few essential materials and tools. Here’s a list of what you’ll need:
Materials:
- Wood boards: Choose sturdy and straight boards that are the appropriate size for your bookshelf design.
- Screws: Opt for screws that are long enough to securely hold the wood boards together, but not so long that they poke through the boards.
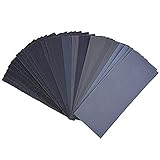
- Sandpaper: Use sandpaper with a medium grit to smooth out any rough edges or surfaces on the wood.
- Wood glue (optional): If you want extra strength and stability, you can use wood glue in addition to screws to hold the boards together.
Tools:
- Screwdriver: A screwdriver will be used to tighten and secure the screws into the wood.
- Drill: If you prefer to pre-drill holes for the screws, a drill will come in handy. This helps prevent the wood from splitting when you insert the screws.
- Saw: A saw will be used to cut the wood boards to the desired lengths and shapes.
- Measuring tape: Use a measuring tape to accurately measure the dimensions of your bookshelf and ensure precise cuts.
Now that you have gathered all the necessary materials and tools, you’re ready to embark on your homemade wooden bookshelf project! Remember to follow safety precautions and enjoy the process of creating a beautiful and functional piece for your home.


Measuring and Cutting the Wood
To measure and cut the wood for your bookshelf, start by determining the desired dimensions for each board. Grab a measuring tape and measure the length, width, and height you want for your bookshelf. Once you have these measurements, transfer them onto the wood boards using a pencil or a marker. Remember to measure twice to ensure accuracy.
After marking the measurements on the wood, it’s time to grab your saw. Make sure you have a saw that is suitable for cutting wood. Begin by placing the wood securely on a stable surface, such as a workbench or sawhorses. Take caution to ensure the wood doesn’t move during the cutting process.
With the wood properly secured, carefully position the saw at the starting point of your cut. Align the blade with the marked line and hold the saw firmly with both hands. Start cutting by applying gentle pressure and begin sawing with a slow and steady motion. Let the saw do the work and avoid forcing it through the wood.
Continue cutting along the marked lines, ensuring a smooth and straight cut. Take your time and be patient. If you encounter any knots or tough spots in the wood, adjust your sawing technique to avoid any mishaps.
Once you have finished cutting all the boards to the correct sizes, double-check to ensure they match your desired dimensions. Sand the edges if necessary to smooth out any rough spots.
Now you have successfully measured and cut the wood boards for your bookshelf! Proceed to the next steps in your project and enjoy the process of assembling and finishing your bookshelf.
Assembling the Frame
To assemble the frame of your bookshelf, you’ll need to join the wood boards together securely using screws and a screwdriver. Here’s a step-by-step guide to help you out:
- Start by positioning two of the wood boards on a flat surface, parallel to each other. These will be the sides of your frame.
- Place a third wood board horizontally across the top, aligning it with the edges of the side boards. This will be the top of your frame.
- Using a pencil, mark the locations where the boards overlap. This will help you align them properly before securing with screws.
- Now, grab your screwdriver and screws. Choose screws that are appropriate for the thickness of your wood boards.
- Align the first two boards together, making sure they are flush along the edges. Insert a screw through one of the marked locations and into the second board.
- Repeat the process at the remaining marked locations, securing the two side boards together.
- Next, align the top board with the side boards, ensuring it is flush along the edges. Insert screws through the marked locations and into the side boards to secure the top in place.
- Double-check that all the boards are aligned properly and tighten the screws until they are snug, but be careful not to overtighten and damage the wood.
- Congratulations! You have now assembled the basic frame of your bookshelf. Make sure the corners are square and adjust if necessary before moving on to the next step in the assembly process.
Remember to refer to the specific instructions provided with your bookshelf kit or plans, as the process may vary slightly depending on the design. Take your time, follow these steps, and you’ll have your bookshelf frame ready for the next phase of assembly in no time. Happy building!
Adding Shelves
To add shelves to your frame, you’ll need to start by measuring and cutting additional wood boards. First, measure the width and depth of the frame to determine the dimensions of your shelves. Use a tape measure to get accurate measurements, and mark the dimensions on the wood boards with a pencil or marker.
Once you have your measurements, it’s time to cut the wood boards. Use a saw or a circular saw to cut along the marked lines. Make sure to wear protective goggles and gloves to ensure your safety while cutting.
After you have cut the wood boards to the desired size, it’s time to attach them to the frame using screws. Position the first shelf on the frame, making sure it is level and aligned with the sides of the frame. Using a drill, create pilot holes in the corners of the shelf where you want to attach it to the frame.
Next, place the shelf back onto the frame, lining up the pilot holes with the corresponding spots on the frame. Insert screws through the pilot holes, and tighten them using a screwdriver or drill.
Repeat this process for each additional shelf. Make sure to double-check the levelness and alignment of each shelf before attaching them to the frame.
By following these steps, you’ll be able to measure, cut, and attach additional wood boards to your frame, creating sturdy and functional shelves. Remember to always prioritize safety and take precautionary measures while working with tools and materials. Good luck with your project!
Finishing Touches
To smoothen the wooden surfaces, first, ensure you gather all the necessary materials: sandpaper (of different grits), a sanding block, and a dust mask. Start by attaching a coarse-grit sandpaper (around 80 grit) to the sanding block, and firmly sand the entire surface in the direction of the wood grain. This will help remove any rough areas or imperfections.
Next, switch to a finer grit sandpaper (around 120 grit) and repeat the process. Keep sanding until you achieve a smooth and even surface, making sure to sand in the same direction as the wood grain. Afterward, you can further refine the surface by using even finer grits (such as 220 grit) if desired.
Once you have completed the sanding process, it is crucial to apply a finish or stain to protect the wood and enhance its appearance. Start by preparing the surface, ensuring it is clean and free from dust. Then, use a brush or cloth to apply a thin and even layer of your chosen finish or stain, following the manufacturer’s instructions.
Allow the first coat to dry completely before applying subsequent coats, if necessary. Multiple coats may be required to achieve the desired level of protection and finish. After the final coat, make sure to let the piece dry thoroughly before handling or using it.
Remember, sanding the wood surfaces will give them a smoother feel and a more polished appearance. Applying a proper finish or stain not only protects the wood from damage but also brings out its natural beauty. Take your time, follow these instructions, and enjoy the rewarding process of giving your wooden surfaces those finishing touches.
Final Assembly
To assemble the bookshelf and ensure everything is secure, follow these step-by-step instructions:
- Attach any remaining pieces: Begin by confirming that all the necessary shelves, sides, and back panels are in place. Carefully place each piece in its designated spot, ensuring a snug fit.
- Secure the bookshelf: Now it’s time to make sure everything is held firmly together. Using a screwdriver or Allen wrench (as specified in the assembly instructions), insert the provided screws or bolts into the pre-drilled holes. Tighten them securely, but avoid over-tightening to prevent damage.
- Check for stability: After securing all the pieces, assess the stability of the bookshelf. Gently shake it from side to side to see if there is any wobbling or rocking. If you notice any instability, ensure that all screws and bolts are tightened correctly. Additionally, make sure all components are properly aligned and that the shelves are resting evenly.
- Adjust if necessary: To address any stability issues, you might need to make some adjustments. Check if all the shelves are level and adjust them if needed. If the bookshelf is on an uneven surface, consider using furniture pads or shims under the legs to even it out. You can also double-check that all screws and bolts are tightened uniformly for maximum stability.
Remember, a stable bookshelf is crucial for the safety of your belongings and for the longevity of the furniture itself. Take your time during assembly, and if you have any doubts or questions, consult the manufacturer’s instructions or reach out to their customer support for further assistance. Happy organizing!
Wrapping up the project
In conclusion, creating a homemade wooden bookshelf is a rewarding and fulfilling DIY woodworking project. By following the main steps outlined in this guide, you have learned how to choose the right materials, measure and cut the wood, assemble the pieces, and finish the bookshelf to your desired look.
Take pride in the fact that you have accomplished a practical and beautiful addition to your home. The process may require time and effort, but the end result is definitely worth it. Embrace the joy of seeing your books neatly displayed on a bookshelf that you built with your own hands.
Remember, woodworking is an art that can be learned and perfected with practice. So don’t be discouraged if your first attempt isn’t perfect. Keep honing your skills, exploring new designs, and creating more beautiful pieces. Enjoy the satisfaction that comes with completing a DIY woodworking project, and let your creativity shine through your homemade bookshelf.
Happy woodworking!