Welcome to the quick summary for our step-by-step guide on how to maintain woodworking hand tools! In this guide, we will walk you through the essential steps to keep your woodworking hand tools in top-notch condition. Woodworking hand tools are crucial for any woodworking project, and by maintaining them properly, you can ensure their longevity and performance. From cleaning and lubricating to sharpening and storing, we will cover everything you need to know to take care of your woodworking hand tools. So, let’s dive in and get your tools in great shape!
Top Picks for Craftsmen and DIY Enthusiasts


Step 1: Clean your tools
To start, remove any dirt, dust, or debris from your woodworking hand tools. Grab a brush or some compressed air and give your tools a thorough cleaning. Make sure to get into all the nooks and crannies. If your tools have metal parts, you can also use a mild cleaning solution and a cloth to wipe them down. This will help remove any grease or grime that may have accumulated. Remember to dry your tools properly after cleaning them to prevent rusting. You don’t want your tools to deteriorate due to moisture!
Here are some easy-to-follow steps for cleaning your woodworking hand tools:
- Grab a brush or compressed air to remove dirt, dust, and debris from your tools.
- If your tools have metal parts, use a mild cleaning solution and a cloth to wipe them down.
- Make sure to dry your tools properly after cleaning to prevent rusting.
By following these simple steps, you’ll keep your woodworking hand tools clean and in top shape, ready for your next project!


Step 2: Sharpen the blades
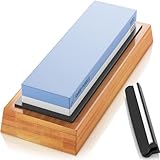
To keep your woodworking hand tools functioning properly, it is crucial to keep their blades sharp. Here’s a step-by-step guide on how to sharpen your tools using a sharpening stone or a honing guide:
- Gather your materials: You will need a sharpening stone or honing guide, water for lubrication (if using a sharpening stone), and a towel or rag to wipe off any debris.
- Prepare the tool: Secure the tool in a vise or clamp it down to keep it steady during the sharpening process. Make sure the blade is clean and free from any rust or debris.
- Set up the sharpening stone or honing guide: If using a sharpening stone, place it on a stable surface. If using a honing guide, follow the manufacturer’s instructions to attach the tool securely.
- Start sharpening: Hold the tool with a firm grip and position it at the appropriate angle on the stone or honing guide. Move the blade back and forth across the stone or along the guide, applying even pressure.
- Maintain the angle: Keep the angle consistent as you sharpen. This will ensure an even edge on the blade. It may help to mark the angle on the blade with a marker for reference.
- Check your progress: Regularly inspect the blade to assess how much material has been removed. Look for a shiny, uniform edge, indicating that the blade is being sharpened evenly.
- Test the sharpness: Once you are satisfied with the edge, carefully remove the tool from the vise and test its sharpness on a scrap piece of wood. Make any necessary adjustments or additional passes to achieve the desired level of sharpness.
Remember, take your time when sharpening your tools and follow the manufacturer’s instructions for the best results. A sharp blade will not only improve the efficiency of your woodworking, but it will also help prevent accidents due to dull tools. Happy sharpening!
Step 3: Lubricate the moving parts
To maintain the smooth operation of your woodworking hand tools, start by applying a few drops of lubricating oil or silicone spray. Take note of the hinges, pivot points, and any other areas that require lubrication. Ensure that you use the right type of lubricant for your specific tool. This will help reduce friction and keep the parts moving freely.
Once you’ve identified the areas that need lubrication, carefully apply the oil or silicone spray. Use a small dropper or spray bottle to distribute the lubricant evenly. Be sure to cover all the moving parts, ensuring that each joint and connection receives sufficient lubrication. This step is crucial in preventing wear and tear on the tool’s components.
After applying the lubricant, take a clean cloth and wipe off any excess oil. This will help prevent dust and debris from accumulating on the tools and causing further friction. Remember, excess oil can attract dirt and make the overall performance of your tools less efficient. By removing the excess lubricant, you ensure that your woodworking hand tools remain in excellent working condition.
Following these simple steps of lubricating your woodworking hand tools will help prolong their lifespan and keep them operating smoothly. Regular maintenance and care will ensure that your tools continue to deliver excellent results for all your woodworking projects.
Step 4: Store your tools properly
Proper storage is crucial to protect your woodworking hand tools from damage. To ensure their longevity, you should follow a few simple steps. First, clean and dry your tools thoroughly before storing them. Remove any sawdust, dirt, or debris using a brush or a soft cloth. Additionally, consider wiping them down with a rag dipped in a light oil or wax to prevent rust.
Next, organize your tools using a tool rack, toolbox, or a dedicated cabinet. This will not only make it easier to find the right tool when you need it but also provide protection against moisture and dust. If you opt for a tool rack, hang your tools up using hooks or pegs, keeping each tool in its designated spot. For a toolbox, make sure it has compartments or trays to keep your tools separated and prevent them from banging into each other. Finally, if you have a dedicated cabinet, store your tools in their proper place, using drawers or shelves to maintain order.
By following these simple steps, you can ensure that your woodworking hand tools are stored properly, protecting them from damage and allowing them to remain in good condition for years to come.
Step 5: Regular maintenance
Regularly inspect your woodworking hand tools for any signs of wear or damage. Replace any worn-out or broken parts promptly. This will help ensure that your tools function properly and prevent any accidents while you work. To inspect your tools, follow these steps:
- Examine each tool closely, checking for any cracks, chips, or other signs of damage.
- Test the hinges, locks, or any moving parts to make sure they still work smoothly.
- Inspect the handles or grips for any splinters, cracks, or loose fittings.
- Check the cutting edges for any dullness, chips, or nicks.
Additionally, periodically repeat the cleaning, sharpening, and lubricating steps to ensure that your tools are always in optimum condition. By doing so, you’ll extend the lifespan of your tools and maintain their performance. Follow these steps for regular maintenance:
- Clean your tools after each use using a soft cloth or brush to remove any debris or sawdust.
- Sharpen the blades or cutting edges using appropriate sharpening tools such as files or whetstones. Be careful not to over-sharpen and remove too much metal.
- Lubricate any moving parts with a few drops of lubricating oil or silicone spray. Wipe off any excess oil to prevent accumulation.
By following these simple steps, you can keep your woodworking hand tools in top shape and ensure that they last for years to come. Happy woodworking!
Tips for Long-lasting Tools
Conclusion:
Congratulations! You’ve reached the end of our blog post on how to maintain your woodworking hand tools. By now, you should have a good understanding of the importance of maintenance and the step-by-step guidelines to keep your tools in top-notch condition. Remember, taking care of your tools not only extends their lifespan but also ensures optimal performance. So go ahead and put these tips into practice to enjoy years of woodworking success!
Essential Equipment


Expert Techniques
Getting Started with Woodworking Hand Tools
- Select the right tools: Invest in essential woodworking hand tools such as a quality set of chisels, a combination square, a hand plane, a coping saw, and a set of clamps. These tools will allow you to perform a wide range of tasks
- Learn proper technique: Take the time to learn how to use each tool correctly. Watch tutorial videos, read books or articles, or even consider taking a woodworking workshop. Proper technique will not only improve your results but also ensure safety while using the tools
- Practice on scrap wood: Before working on your actual project, practice using the tools on scrap wood. This will help you familiarize yourself with the tools and gain confidence in your abilities. Start with simple cuts, drills, or shaping to get comfortable with the tools
- Start with small projects: Begin with small woodworking projects that will allow you to apply the skills you’ve learned. This could be something like a small shelf or a picture frame. As you gain more experience and confidence, you can work on larger and more intricate projects
- Remember, using woodworking hand tools is an art form that takes time and practice to master. Don’t be discouraged if things don’t go perfectly at first. Just keep practicing and refining your skills, and you’ll gradually become more proficient. Good luck on your woodworking journey!